
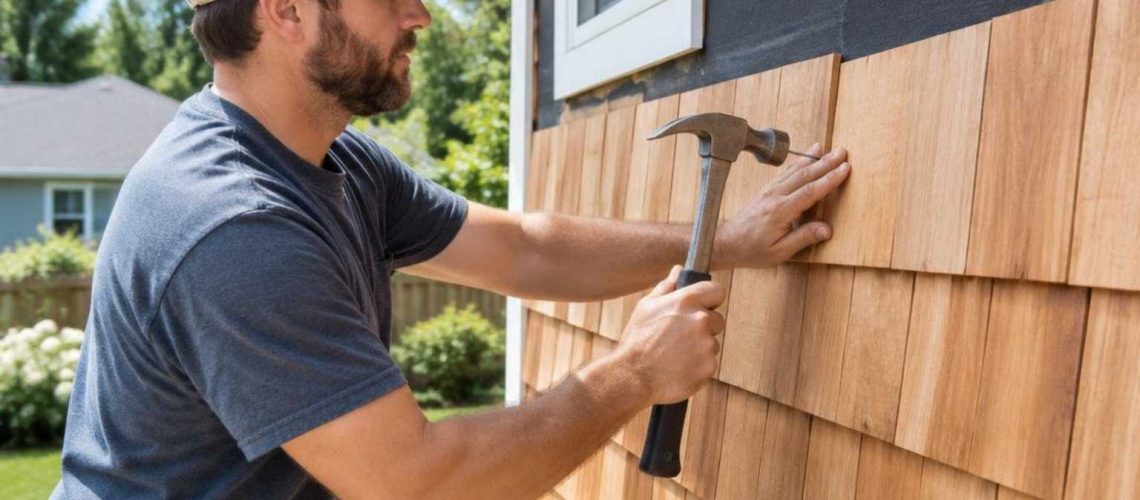
Cedar Shingle Siding Installation Starts With Water Control
For a sound cedar shingle siding installation, start with a flat wall, a weather-resistant barrier, and flashing around openings. Install a double-layer starter course, then work upward in level rows. Leave room between shingles for expansion, stagger the joints, and use corrosion-resistant fasteners. The exact exposure and spacing depend on the shingles you choose.
The careful work is in the details: keeping water out around windows, finishing corners, and leaving the siding room to dry. This guide walks through those steps without assuming you already know the trade.
I’m John Martin of Martin & Sons, a family-owned home improvement company in St. Louis. I bring more than 35 years of industry experience to this guide to cedar shingle siding installation.
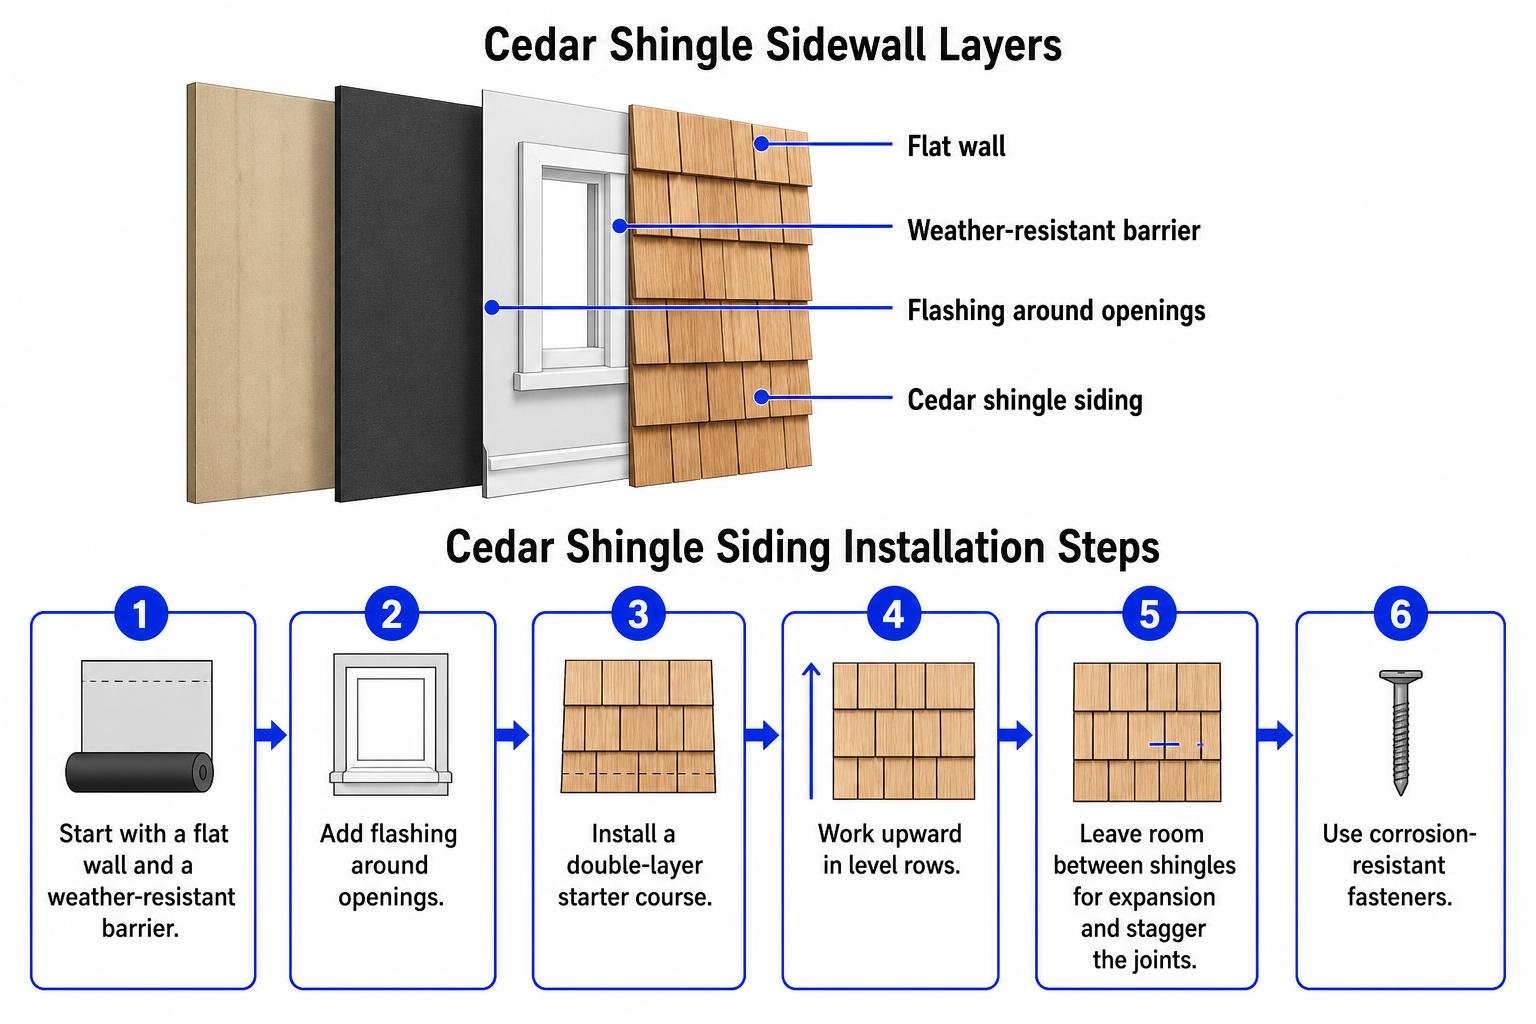
Cedar shingle siding installation vocab to learn:
Planning and Preparation for Cedar Shingle Siding Installation

A long-lasting installation starts long before you pull your hammer out of the tool belt. Wood is a natural, dynamic material that expands when wet and contracts when dry. If moisture gets trapped behind your sidewall, you risk wood rot, peeling finishes, and wall damage.
When planning your layout, budgeting accurately is critical. Before picking up materials, take time estimating siding installation costs for your full square footage. Cedar shingles are sold by “the square,” which equals 100 square feet of wall coverage. When measuring your exterior walls, always calculate the gross surface area and plan to order 10% to 20% more shingles than you need to allow for cutting waste, corner trimming, and sorting.
Shingles vs. Shakes: Selecting Your Siding Material
Homeowners often use the terms interchangeably, but cedar shingles and shakes are structurally distinct products. Understanding the difference helps you pick the right look and performance profile when comparing house siding options.
| Feature | Cedar Shingles | Cedar Shakes |
|---|---|---|
| Manufacturing Process | Sawn on both sides for a smooth, uniform surface | Split from logs with a hand-split or tapersawn face |
| Butt Thickness | Typically 3/8-inch to 7/16-inch (Premium) | Usually 1/2-inch to 3/4-inch or thicker |
| Appearance | Tailored, geometric, and uniform | Rustic, textured, and deeply grained |
| Recommended Exposure | Standard 5-inch exposure on sidewalls | 7-inch to 10-inch exposure depending on thickness |
| Shadow Line | Subtle, clean shadow line | Heavy, dramatic shadow line |
For siding applications, sawn Western Red Cedar or Eastern White Cedar shingles graded as Number 1 (Certi-label®) provide the highest durability. Premium shingles featuring a butt thickness of 7/16-inch are rated to last 50 years or more with standard maintenance.
Tools, Materials, and Wall Moisture Management
Modern building science emphasizes drainage planes. We strongly recommend creating a rainscreen gap behind cedar shingles using a vapor-permeable underlayment (or No. 30 ASTM D226 Type II felt) paired with a 3D spacer mat. This creates a minimum 1/4-inch drainage cavity that lets moisture escape and lets both sides of the wood breathe.
Essential tools for this project include:
- Stainless steel fasteners (nails or staples)
- 16-ounce smooth-face claw hammer or pneumatic siding stapler
- Chalk line (using white or light chalk to avoid staining wood)
- Block plane and sharp utility knife
- Story pole (a wood rod marked with course intervals)
- Aluminum or copper head flashing
- Non-hardening exterior sealant
For comprehensive background reading on hand-tool methods and historic techniques, check out Fine Homebuilding’s cedar shingle guide.
Step-by-Step Sidewall Installation and Finishing
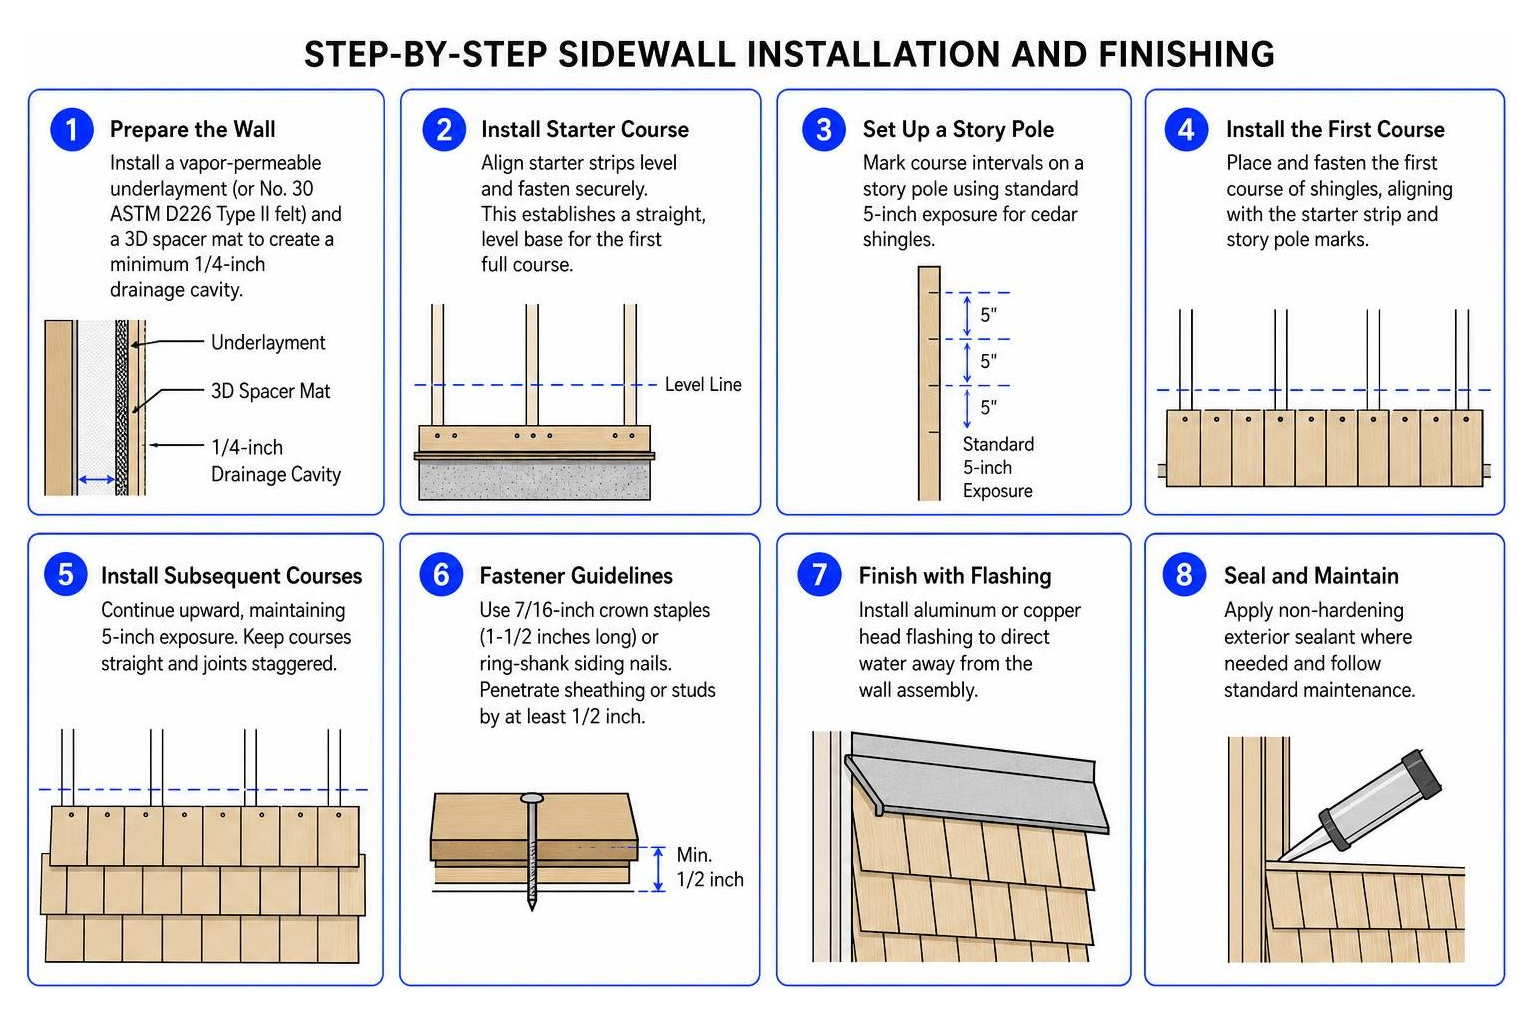
Fastener Guidelines and Starter Courses in Cedar Shingle Siding Installation
Fastener selection makes or breaks a cedar exterior. Cedar contains natural tannins that corrode standard steel and cause black chemical streaking across your wall.
- Fastener Metal: Always use Type 304 stainless steel or hot-dipped galvanized fasteners. Nails and staples MUST be stainless steel Type 316 in locations within fifteen (15) miles of salt water.
- Fastener Type: Use 7/16-inch crown staples (1-1/2 inches long) or ring-shank siding nails with a minimum 7/32-inch head. Fasteners must penetrate the sheathing or wall studs by at least 1/2 inch.
- Starter Course Execution: The starter course at the bottom of the wall requires a double layer of shingles. The undercourse can use an economical grade (like Number 4 utility shingles), while the face course must be your finish grade. The starter course must extend at least 1 inch beyond the foundation to keep water off the wall. Offset the outer layer’s joints from the bottom layer’s joints by at least 1-1/2 inches.
For official fastener schedules and coursing details, reference the Cedar Shake & Shingle Bureau sidewall manual.
Laying Subsequent Courses with Proper Exposure and Spacing
Consistency is the secret to clean cedar shingle lines. A recommended exposure for cedar shingles is 5 inches, which provides 25 square feet of coverage per bundle or box.
- Marking Course Heights: Use a story pole or snap chalk lines at 5-inch increments up the wall. You can also temporarily screw an 8-foot straight board (ledger) along the line to rest your shingle butts on while you nail.
- Spacing (Keyways): Leave a minimum of 1/8-inch gap between each kiln-dried shingle (1/16-inch for green wood) to account for moisture expansion. If shingles are installed tight against each other, they will buckle and pop off the wall—a flaw known as “fishmouthing.”
- Joint Staggering: Joints between shingles in successive courses must be offset by at least 1-1/2 inches. Ensure that joints in alternate courses do not align directly over one another across three consecutive rows.
- Fastening Pattern: Place two fasteners per shingle, driven about 3/4-inch in from each outer edge and 1 inch above the exposure line of the upcoming course (so the next row covers the fastener heads). For shingles over 8 inches wide, use 2 additional fasteners driven 1 inch apart near the shingle center.
Navigating Corners, Openings, and Gables During Cedar Shingle Siding Installation
Corners and penetrations require extra attention to detail:
- Corner Boards vs. Woven Corners: If using vertical wood corner boards, ensure they extend at least 1 inch beyond the sheathing to receive the shingle butts. Maintain a 1/8-inch gap between the shingle edge and the corner board, sealed with non-hardening sealant. Alternatively, you can create a classic woven corner by alternating overlapping shingle edges on each course and hand-planing them flush with a block plane.
- Window and Door Openings: Install rigid metal head flashing over all window and door drip caps. Leave a 1/4-inch drainage gap between the bottom edge of the cedar shingles and the metal flashing surface. Never jam shingles tight against window heads, as trapped water will wick upward into the wood.
- Gables and Top Courses: As you reach the gable peaks, trim shingles along the rake angle with a fine-tooth saw or utility knife. The final course under the eaves or soffit should maintain at least a 4-inch exposure and can be face-nailed with small stainless steel ring-shank nails.
Finishing, Staining, and Long-Term Care
Natural cedar contains water-soluble extractive oils that give the wood its pleasant scent and natural rot resistance. However, when exposed to moisture without a protective finish, these oils can wash out and cause extractive bleeding (dark, unsightly stains).
To prevent this:
- Pre-Stain All Four Sides: Whenever possible, apply an oil-based stain or primer to all four sides and cut ends before installation.
- Topcoats: For an opaque painted finish, apply an alkyd oil primer followed by two coats of 100% acrylic latex exterior paint. For a classic weathered appearance, apply a semi-transparent penetrating stain or a weathering agent to ensure even color development.
- Avoid Clear Film Coatings: Never use non-breathable varnishes or lacquers on exterior cedar sidewalls, as they peel quickly under UV exposure.
If you are exploring different exterior designs or weighing maintenance requirements, review our advice on how to pick the perfect vinyl siding for your house or check out our fiber cement siding complete guide.
For complex historic renovations or full-scale replacements across St. Louis, St. Peters, Chesterfield, and surrounding communities, hiring experienced professionals ensures your exterior envelope is completely watertight. Feel free to review our checklist for hiring siding replacement contractors or explore our professional siding installation services in St. Louis. At Martin & Sons, we believe in doing every job right the first time: we require no upfront deposits, offer lifetime labor warranties, and you only pay upon 100% completion and satisfaction. Please note that while we offer gutter solutions alongside complete roof installations, our primary siding and roofing teams are dedicated to building long-lasting exteriors. Reach out to our team at our Florissant office today to discuss your next home upgrade!