
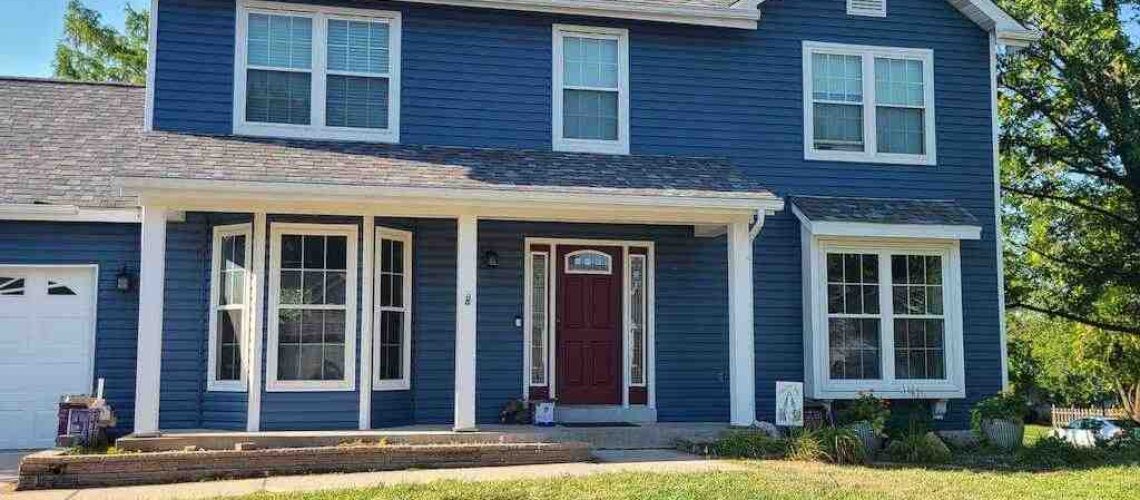
What to Expect From Professional Window Installation
Window installation is more than fitting a new window into a wall. A reliable installer should inspect the opening, recommend either an insert or full-frame replacement, manage flashing and drainage, seal air gaps, and confirm the window opens, locks, and drains correctly.
For St. Louis homeowners planning a renovation, the right service helps prevent drafts, water damage, and costly repairs later. The best choice depends on the condition of the existing frame, the home’s exterior, and whether hidden rot or old paint may be involved.
I am John Martin of Martin & Sons, a family-owned company founded in 1953, with more than 35 years of hands-on experience in window installation and exterior home projects. In this guide, I will help you understand what a quality installation should include before you choose a contractor or start work yourself.
Full-Frame vs. Insert Replacement Methods
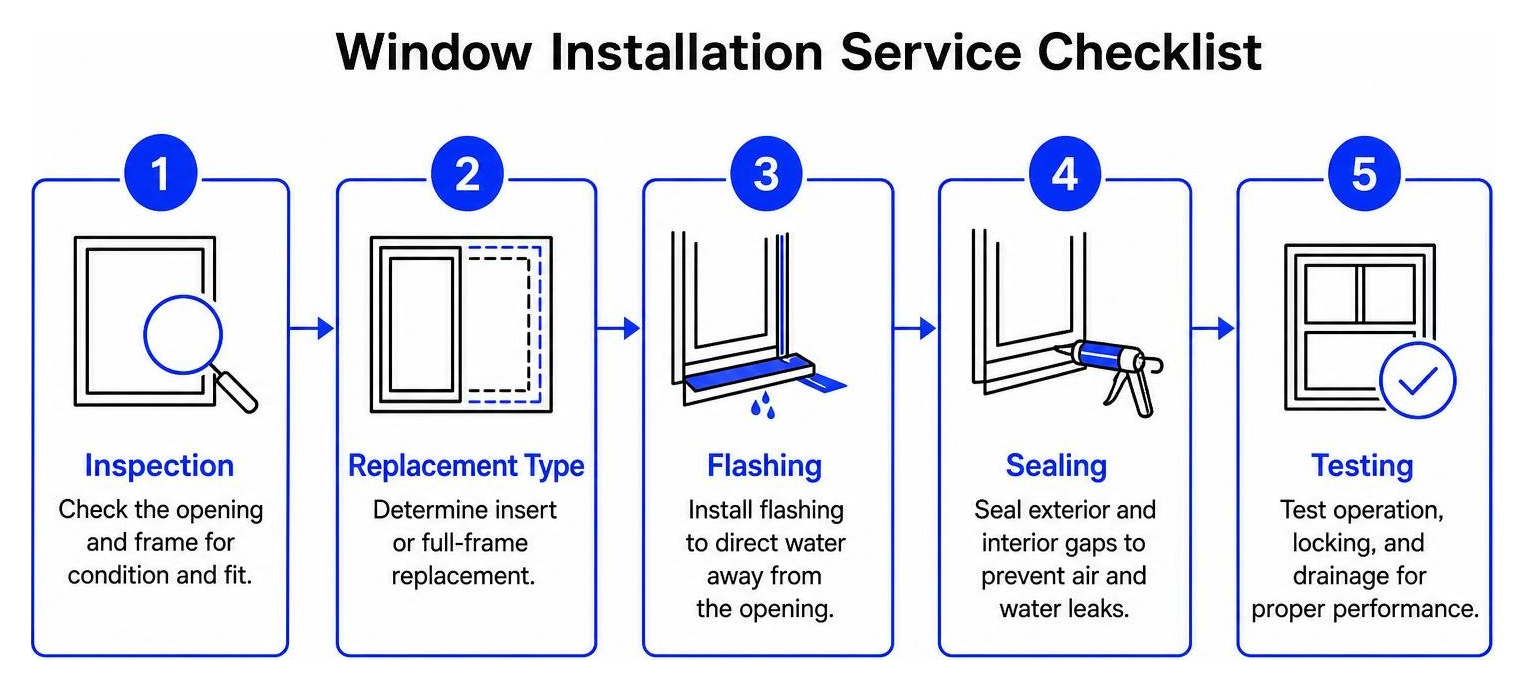
When starting a window installation project in the Greater St. Louis area, one of the first decisions you must make is whether to execute a full-frame replacement or an insert (pocket) window installation. Both methods have distinct structural requirements, trade-offs, and ideal scenarios.
An insert replacement window allows us to preserve the home’s original frame, interior casing, and exterior trim. The installer slips a compact replacement unit directly into the existing wood frame. This approach works exceptionally well when the underlying structural frame, sill, and jambs are completely sound, square, and free of wood decay or rot. Insert installations save labor time, protect interior decorative moldings, and keep your total project investment manageable. However, because the new window frame sits inside the existing frame, you lose a minor fraction of overall glass viewing area.
Conversely, a full-frame window replacement requires a total tear-out down to the rough structural wall framing studs. We completely remove the sashes, master frame, interior trim, window sills, and exterior brick mould or casing. While this method requires more labor (taking roughly 4 to 6 hours per ground-level window compared to 1 to 2 hours for insert units), it is essential if your home has structural rot, water damage, or settled wall framing. Full-frame replacement is also necessary if you want to alter the shape or size of your opening or maximize glass area.
| Feature / Consideration | Insert (Pocket) Replacement | Full-Frame Replacement |
|---|---|---|
| Existing Frame Required? | Must be structurally sound, plumb, and rot-free. | Completely removed down to rough stud opening. |
| Interior & Exterior Trim | Preserves original trim and casing intact. | Requires replacing interior casing and exterior trim. |
| Glass Viewing Area | Slightly reduced (approx. 1/2″ to 1″ per side). | Maximized to full rough opening boundaries. |
| Water Intrusion Repair | Cannot repair hidden sill or stud decay behind frame. | Exposes and fixes all structural framing rot. |
| Installation Time per Unit | 1 to 2 hours average. | 4 to 6 hours on ground floor (longer on upper floors). |
| Ideal Application | Sound wood frames; historic interior trim preservation. | Severely rotted frames; changing window dimensions. |
Choosing between these techniques comes down to inspecting the framing integrity. For home renovations across Chesterfield Window Installation or Creve Coeur Window Installation, we always check wood moisture levels with a probe before recommending an insert fit.
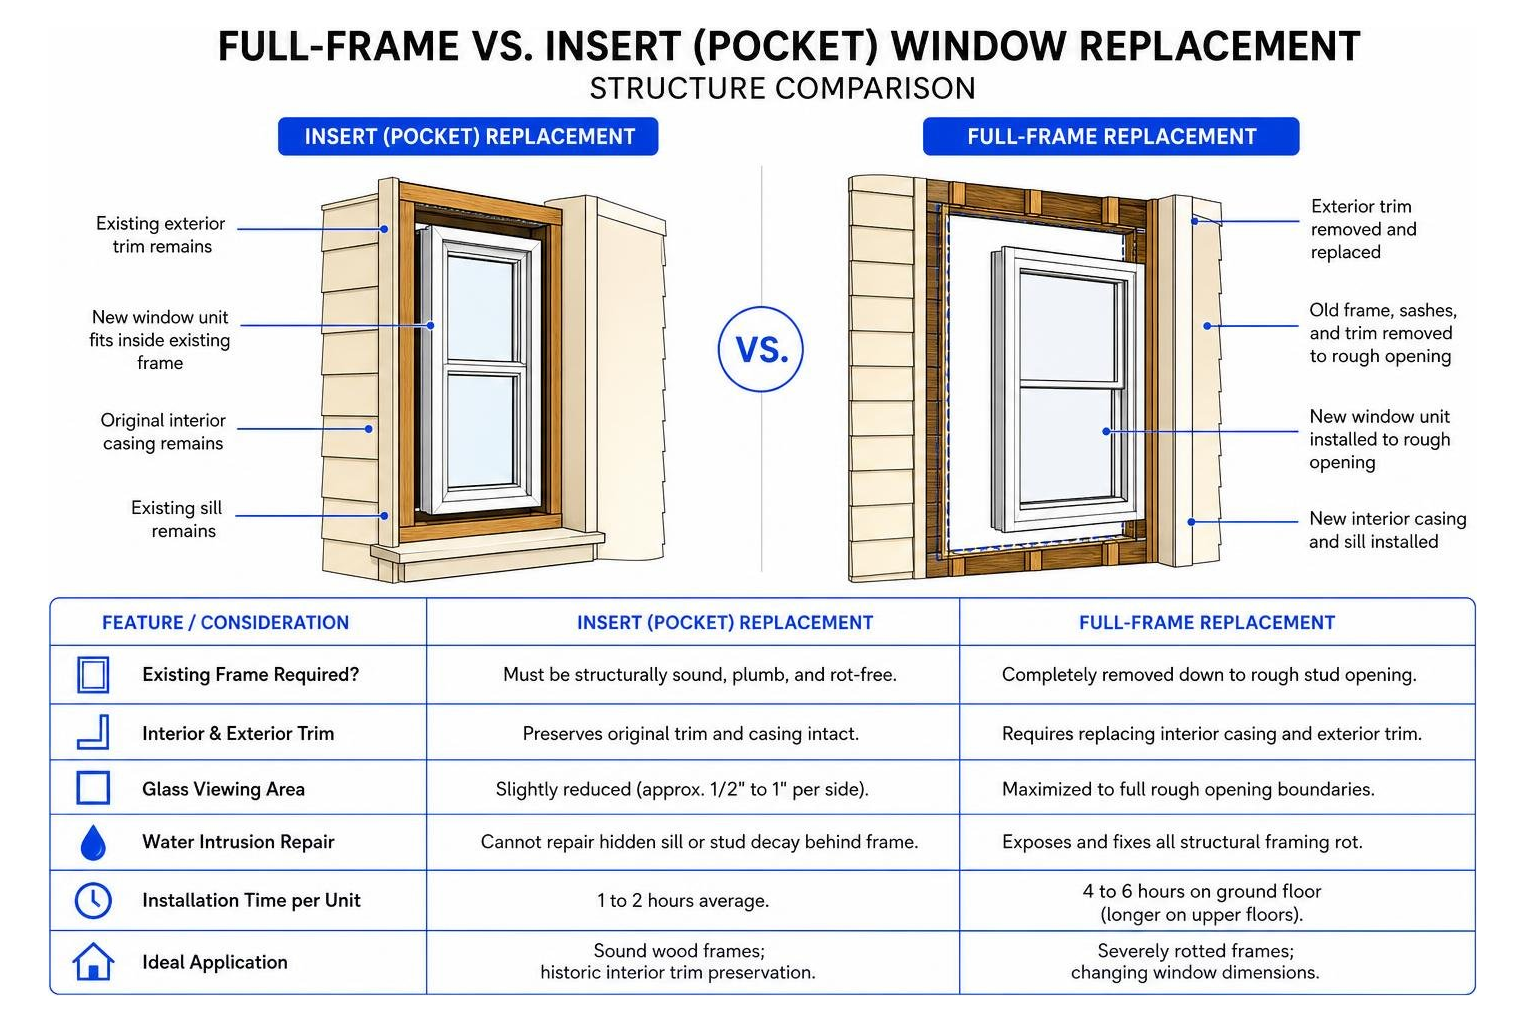
Essential Step-by-Step Window Installation Procedures
Executing a lasting installation requires systematic weatherization practices. Windows are the primary dynamic barrier in your home’s exterior wall assembly; if installed incorrectly, moisture can penetrate deep into interior wall cavities long before visible stains appear on your drywall.
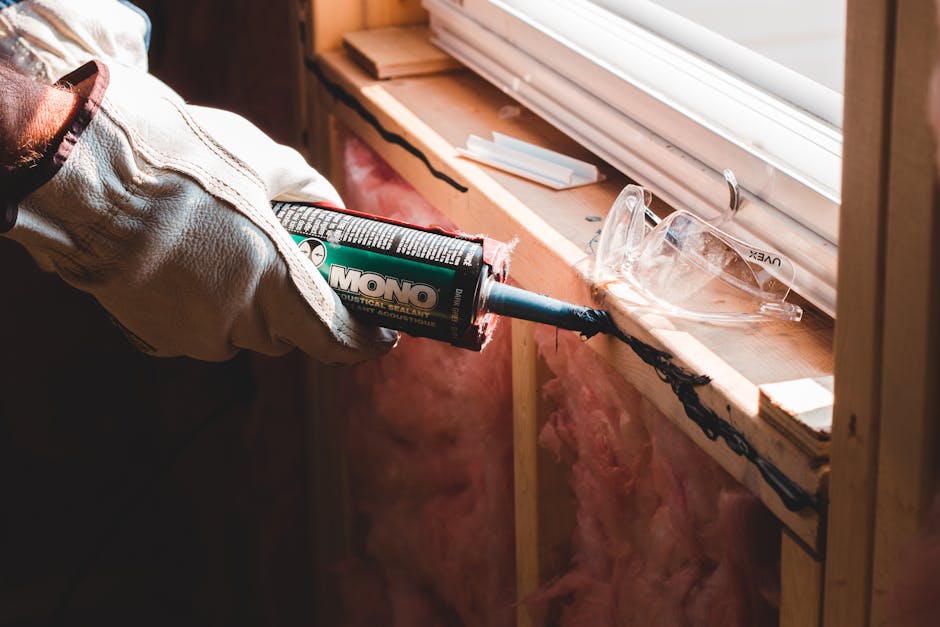
Step 1: Opening Prep and Lead Safety During Window Installation
Preparing the rough opening begins with strict safety compliance and detailed dimensional auditing. For homes built prior to 1978, the United States Environmental Protection Agency (EPA) Lead Renovation, Repair, and Painting (RRP) rule dictates specific containment procedures. Disturbed paint can release toxic lead dust into living areas during frame removal. Certified protocols require laying 6-mil plastic sheeting across floor surfaces extending 10 feet out, sealing off interior doorway air passages, using HEPA-vacuum attached power tools, and performing lead dust clearance testing upon completion.
Once the opening is safely exposed, we measure the rough opening dimensions across three points: top, middle, and bottom for width; left, center, and right for height. Industry standard guidelines (such as ASTM E2112) dictate that a rough opening should measure 1/2 inch to 1 inch wider and taller than the window unit’s overall frame size (or 3/4 inch larger for mulled combination units).
Next, verify that the opening is square by taking diagonal measurements from corner to corner. The difference between the two diagonal lines must not exceed 1/4 inch overall (and no more than 1/8 inch for smaller windows under 20 square feet). Use a spirit level or digital level to check that the bottom sill plate and side jamb studs are plumb and level. Inspect any wood bucks or underlying jack studs for rot, replacing soft timber with pressure-treated blocking where necessary.
Step 2: Weatherproofing and Water Management Systems
Water management is built on a single reality: all exterior wall systems will eventually experience incidental water penetration. A modern window installation must provide a clear, gravity-assisted drainage path for water to exit the wall structure safely.
When fitting units, review the Flangeless Window Installation Guide or applicable manufacturer directions to maintain your building envelope’s integrity. The process begins at the base of the opening:
- Weather Resistant Barrier (WRB) Cut: Make a modified I-cut in the exterior housewrap (WRB). Fold the side flaps tightly into the opening and fasten them to the framing studs. At the head of the opening, make a 45-degree diagonal cut extending upward roughly 6 inches to create a temporary flap, which will be folded down over head flashing later.
- Flexible Sill Pan Panelling: Install a sloped sill pan or high-performance self-adhering flexible flashing tape (such as butyl-based membrane) along the rough sill plate. Ensure the sill pan extends at least 2 inches up the side jambs to create protective end dams. The sill plate itself should possess a slight positive outward slope so any water shedding off the unit flows toward the exterior cladding.
- Flashing Layer Sequence (Shingle-Fashion): Always layer flashing materials in “shingle fashion”—where higher pieces overlap lower pieces to direct water downward over the exterior surface.
- Apply vertical side jamb flashing strips extending past the sill flashing.
- Apply head flashing over the upper nail flange or frame, extending beyond the side flashing edges.
- Fold the head WRB flap down over the top head flashing and tape the 45-degree cuts securely.
- The Uncaulked Bottom Flange Principle: A critical installation rule for flanged windows is to never apply sealant or flashing tape across the bottom sill flange. Apply a continuous 3/8-inch bead of high-grade exterior sealant along the top and side interior mounting flanges, but leave the bottom sill flange unsealed. Leaving 2-inch wide sealant voids near both bottom corners ensures that any water trapped in the sill pan can drain out smoothly. Sealing the bottom flange traps water against your framing, leading to rapid rot.

Frame Anchoring, Air Sealing, and Finishing Standards
Once the rough opening is flashed and prepared, the unit must be set, aligned, anchored, and sealed against interior air infiltration.
Step 3: Shimming, Plumb Verification, and Fastener Schedules
Carefully set the window frame into the rough opening onto non-compressible shim blocks placed at the sill plate. Position these base shims under the window’s vertical structural members (side jambs and mullions), approximately 3 to 4 inches inward from side corners, to prevent frame sagging. Refer to Vinyl Window Installation Guidelines for specific anchoring guidelines.
Never use standard untreated wood shims for exterior openings, as natural wood absorbs moisture and rots over time. Always use high-density composite or horseshoe plastic shims. Insert paired shims along side jambs adjacent to structural anchoring locations to maintain equal reveals:
- Place shims behind side jamb screw holes or side mounting brackets.
- Check plumb (vertical align), level (horizontal align), and square (diagonal balance) continuously using a 4-foot level.
- Adjust shim depth until diagonal measurements match within 1/8 inch.
- Important: Never drive shims tightly above the head frame of a window. Settling roof loads will bow the window frame downward, binding the window sashes and cracking glass seals.
Fastener choices and spacing rely heavily on the window frame material and its structural Performance Grade (PG) rating:
- Embedment Depth: Anchoring screws (#8 pan-head stainless steel or ceramic-coated corrosion-resistant fasteners) must penetrate at least 1-1/4 inches into structural solid wood framing studs (or 1-1/2 inches for heavy flangeless installations).
- Fastener Spacing: For standard residential PG20 units, space fasteners every 12 to 16 inches on-center along side jambs, starting 3 to 6 inches from each corner. For higher wind-load zones (PG50 or coastal impact requirements), reduce fastener spacing to 8 to 10 inches on-center.
- Supplemental Head Anchors: For wide single-hung, double-hung, or multi-lite picture combinations exceeding 60 inches in height or width, install supplemental structural head anchors into the header framing to prevent wind bowing while maintaining thermal expansion clearance.
Step 4: Air Sealing and Exterior Finishing for DIY Window Installation
With the unit anchored firmly, shift focus to creating a continuous interior air seal and applying exterior finishing details. Homeowners looking into The Complete Guide to Vinyl Windows will find that insulating the cavity between frame and studding dictates thermal comfort.
To create an air barrier:
- Low-Expansion Polyurethane Foam: Fill the interior gap between the window frame and framing studs with certified low-expansion window-and-door foam. Never use high-expansion insulation spray foams. High-expansion products expand with enough force to bow vinyl or aluminum frames inward, binding moving sashes and voiding warranties. Apply foam in a continuous 1-inch to 2-inch deep bead from the interior, leaving space for natural frame expansion.
- Backer Rod & Sealant Alternative: For historic narrow-cavity installations, push closed-cell polyethylene foam backer rod into the gap and apply a continuous 1/4-inch bead of interior acrylic or polyurethane sealant over the backer rod to form an air seal.
- Head Drip Caps: On exterior siding installations, install a metal Z-bar drip cap directly above the exterior head trim or casing. Slide the top flange of the drip cap beneath the housewrap barrier so water running down the siding sheds over the front face of the window trim.
- Exterior Gap Tolerances: Maintain a 3/8-inch expansion clearance gap between exterior cladding (such as brick, stone, or vinyl siding) and the window frame perimeter. Fill this gap with backer rod and high-grade exterior silicone or elastomeric sealant to absorb natural building movement.
- Protective Film Removal & Operation Testing: Peel away factory protective plastic films from glass units within specified timeframes (typically within 30 to 60 days, and never leave film on past 6 months or in direct hot sunlight where adhesive bakes onto glass). Finally, perform operational tests: open, close, tilt, and lock every sash to confirm balance springs run smoothly and locking latches engage cleanly without friction.

When to Hire Professional Contractors
While ambitious homeowners can tackle basic ground-floor insert installations, many window replacement scenarios require professional trade expertise. If you want to know how a project will fit your home budget, reviewing Top 8 Factors That Affect Replacement Window Prices or Beginners Guide to Window Replacement Cost is a smart starting point.
Here is when you should bring in an experienced contractor:
- Multi-Story Work: Working from extension ladders or staging pump jacks with heavy glass units poses fall hazards.
- Structural Frame Decay: Discovering rotted sill plates, soft headers, or insect-damaged wall studs demands structural carpentry skills.
- Wall Expansion & Egress Openings: Cutting through exterior brick, stone veneer, or basement concrete foundations to meet egress codes requires specialized masonry equipment and engineering knowledge.
- Complex Exterior Cladding: Integrating window flashing seamlessly behind stucco, real stone, or slate siding requires trade experience to prevent wall leaks.
- Historic Home Lead Compliance: Homes built prior to 1978 with flaking lead paint require EPA RRP-certified containment equipment and strict disposal practices.
When evaluating local contractors in Maryland Heights Window Installation, O’Fallon Window Installation, or Florissant Window Installation, look beyond basic licensing. Request proof of EPA lead-safe certification, review manufacturer install certifications, demand comprehensive worker’s compensation insurance, and check for robust labor warranties. Hiring an established installer who understands regional St. Louis weather patterns protects your home investment long term. Explore our advice on finding reliable crews by checking Local Window Installation Companies You Can Actually Trust.
Frequently Asked Questions
How do you choose between full-frame and insert replacement?
Choose an insert replacement if your current wood window frame, outer brick mould, and sill are structurally sound, square, and free of decay. Inserts preserve historic interior casing trim and speed up installation time.
Choose a full-frame replacement if your existing frame displays softness, mold, rot, or water damage, if the opening is out-of-square, or if you plan to change window sizes or shapes. Full-frame replacements expose the underlying studs so installers can repair framing and install fresh weather-resistant flashing.
What tools and safety gear are essential for project success?
For a safe and accurate installation, gather these essential items:
- Safety Gear: ANSI-approved safety glasses, cut-resistant work gloves, hearing protection, and an EPA-compliant HEPA dust respirator (for pre-1978 homes).
- Measurement & Alignment: 4-foot spirit level, laser level, tape measure, speed square, and digital angle gauge.
- Hand Tools: Flat pry bar, hammer, utility knife, putty knife, chisel, and heavy-duty caulk gun.
- Power Tools: Cordless impact driver, drill with 3/16-inch pre-drill bits, and oscillating multi-tool.
- Consumable Materials: Composite shims, self-adhering butyl flashing tape, low-expansion polyurethane foam, closed-cell backer rod, stainless steel pan-head screws, and exterior-grade sealant.
Why should you leave the bottom exterior sill flange uncaulked?
Leaving the bottom exterior nail flange uncaulked (or leaving explicit sealant voids in the bottom caulk bead) provides a vital exit path for water. If incidental water bypasses the outer window seals during heavy rainstorms, it trickles down into the sloped sill pan.
If the bottom flange is completely caulked tight to the wall exterior, that water gets trapped inside the lower wall cavity. Trapped moisture quickly rots structural framing studs, causes interior drywall mold, and voids manufacturer product warranties.
Conclusion
A successful window installation combines careful opening preparation, correct replacement method selection, layered water management, exact structural anchoring, and proper air sealing. Whether you are replacing builder-grade units in St. Charles or restoring a classic home in Florissant, focusing on proper flashing integration and low-expansion foaming keeps your home draft-free and protected against rain for decades.
At Martin & Sons, we have brought quality exterior craftsmanship to St. Louis area families since 1953. We believe home improvement should be simple and stress-free. That is why we operate with no upfront deposits—you pay only upon 100% completion and satisfaction. Combined with our best prices upfront and lifetime labor warranties, you can upgrade your home with total confidence. (Please note that while we handle comprehensive exterior projects, Martin & Sons only provides gutter services when performing a roofing project, as we are not a standalone gutter company.)
Ready to upgrade your home with energy-efficient windows installed by trusted local professionals? Visit our St. Louis Window Installation service page today or reach out to our team to schedule your free, no-obligation estimate!