
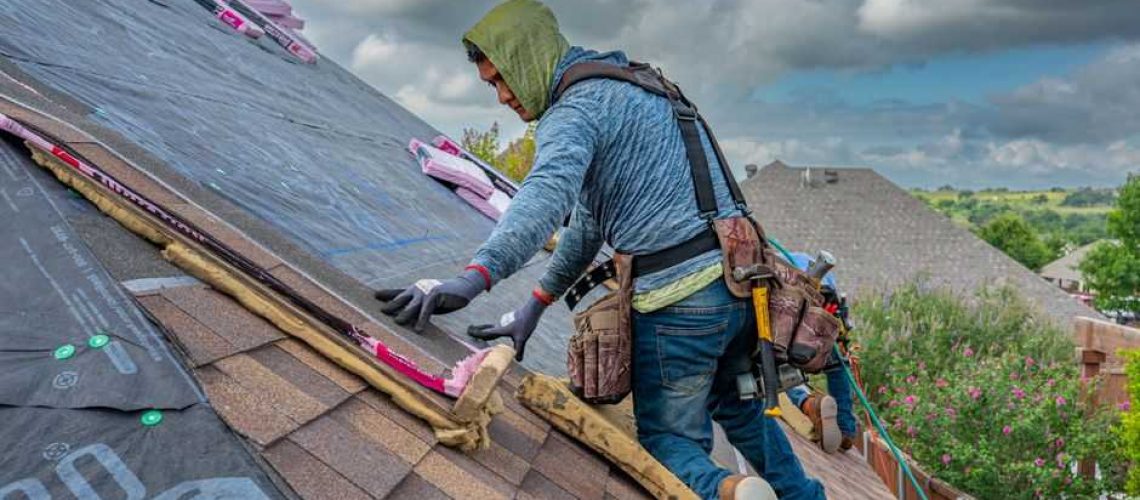
What You Need to Know Before Starting a Roofing Installation
Roofing installation is one of the biggest home improvement projects you’ll ever tackle — and one of the most important to get right.
Quick answer for homeowners:
- Inspect your deck — replace any rotted or damaged sheathing before anything else
- Install drip edge — along eaves first, then rakes after underlayment
- Apply ice-and-water shield — at least 24 inches past the interior wall line in cold climates
- Lay underlayment — felt or synthetic, with proper overlaps
- Flash valleys, chimneys, and vents — this is where most leaks start
- Install your field material — shingles or metal panels, following manufacturer nailing specs
- Cap the ridge and ventilate — proper airflow extends roof life significantly
A well-installed roof should last roughly 20 years for asphalt shingles, or 50+ years for metal roofing. But the material is only part of the story — how it’s installed makes all the difference. According to NRCA data, improper installation is responsible for more than 70% of all roofing failures.
Whether you’re considering a DIY project or hiring a contractor, this guide walks you through every layer of the process — from deck prep and underlayment to flashing, ventilation, and final inspection.
I’m John Martin, co-owner of Martin & Sons LLC, a family roofing business with over 35 years of hands-on experience in roofing installation across the St. Louis area. In that time, I’ve seen how small mistakes during installation — a missed piece of flashing, an improperly nailed shingle — can lead to expensive damage years down the road. This guide is built on that experience, so you know exactly what to look for and what to avoid.
Essential Preparation: Estimating Materials and Safety Protocols
Before a single shingle is torn off or a single nail is driven, successful planning is required. Proper material estimation prevents mid-project delays, while strict adherence to safety protocols ensures everyone goes home safely at the end of the day.
Estimating Materials and Accounting for Waste
Roofing materials are measured and sold by “squares.” One roofing square equals 100 square feet of roof surface. To estimate how much material you need, you must calculate the total square footage of your roof deck and divide by 100.
However, ordering the exact square footage is a recipe for disaster. You must account for a waste factor. Every cut made for valleys, gables, hips, and rakes removes usable material.
- For a simple gable roof with no valleys or dormers, a 10% waste factor is standard.
- For complex roofs featuring hips, valleys, dormers, and chimneys, the waste factor can jump to 15% or even 20%.
Additionally, the pitch (slope) of your roof affects the overall surface area. A steeper roof has a larger surface area than a flat roof with the same footprint. When ordering, shingles are typically sold in bundles (usually three bundles per square), and metal panels are custom-ordered to specific lengths. Always round up to the nearest bundle or panel to ensure you don’t run out during the critical final stages of your roofing installation.
Safety Precautions for DIY Roofing Installation
Roofing is consistently ranked as one of the most hazardous construction jobs. If you are planning a DIY installation, safety cannot be an afterthought. According to OSHA 1926.501(b)(10), roofing work on low-slope roofs requires fall protection for heights of 6 feet or more above lower levels. Do not assume you can “watch your step” — a single misstep can be catastrophic.
Here is an essential safety gear checklist:
- Full-Body Safety Harness: A complete fall arrest system (including a harness, lanyard, rope grab, and heavy-duty roof anchor) costs about $100. It is the best $100 you will ever spend.
- Ladder Tie-Offs: Always secure your ladder at the top to prevent it from sliding sideways. The ladder should extend at least 3 feet above the roofline.
- Rubber-Soled Shoes: Wear high-traction, soft-soled work boots to maximize grip on the decking and underlayment.
- Eye and Ear Protection: Essential when operating pneumatic nail guns, circular saws, or cutting metal panels.
- Heavy-Duty Tarps: Place these over landscaping and windows to catch falling debris and stray nails.
Never work on a wet, frosty, or windy day. Even a light morning dew can turn synthetic underlayment or metal panels into a dangerous slide.
Step-by-Step Guide to Roof Deck Preparation and Underlayment
A roof is only as good as the foundation beneath it. Skipping deck preparation or rushing through underlayment installation is the fastest way to guarantee a premature roof failure.
Preparing the Roof Deck and Installing Drip Edge
Once the old roofing material is torn off down to the bare wood, you must perform a thorough sheathing inspection. Look for signs of wood rot, water staining, warping, or delamination in the plywood or oriented strand board (OSB). Any compromised panels must be replaced immediately. Replacing a sheet of damaged OSB or plywood typically costs between $75 and $110 per sheet in material and labor, but leaving rotted wood in place will cause nails to pull out, leading to shingle failure or structural sagging.
For detailed steps on evaluating your roof’s foundation, see our guide on Roofing Underlayment Replacement And Decking Essentials.
Once the deck is solid, clean, and dry, it is time to install the drip edge. The 2012 International Residential Code (IRC) requires drip edge at the eaves and rake edges of the roof. Drip edge is a corrosion-resistant metal flashing that directs water away from the fascia board and into the gutters.
- At the eaves (bottom edges): Install the drip edge directly onto the bare wood deck before laying down any underlayment. Fasten it every 8 to 12 inches on center.
- At the rakes (side edges): Install the drip edge over the underlayment. This specific ordering ensures that wind-driven rain running off the edge of the roof cannot get under the underlayment.
Proper drip edge integration is crucial for your gutter system to function correctly. You can read more about how these components work together in The Ultimate 5 Inch Gutter Installation Handbook.
Laying Underlayment and Ice Barriers
With the eave drip edge secured, the next layer is the ice-and-water shield (a self-adhering modified bitumen membrane). In regions prone to freezing temperatures, this waterproof barrier is essential. It seals tightly around nail shafts to prevent water from backing up under the shingles when snow melts and refreezes at the cold eaves (a phenomenon known as ice damming). The IRC requires this self-adhering membrane to extend from the eave edge to a point at least 24 inches inside the exterior wall line of the building.
Next, apply your field underlayment over the rest of the roof deck. You can choose between traditional asphalt-saturated felt paper (15-lb or 30-lb) and modern synthetic underlayment. Synthetic underlayment is highly recommended because it is lighter, stronger, tear-resistant, and does not wrinkle when wet.
According to the Owens Corning Roofing Installation Guide, underlayment should be applied with the following overlap specifications:
- Horizontal laps: Overlap each course by at least 2 inches (or up to 4 inches for low slopes).
- Vertical end laps: Overlap seams by at least 6 inches, keeping end laps in adjacent courses staggered by at least 6 feet.
- Fastening: Secure felt paper with plastic cap nails or staples spaced approximately 12 inches apart.
For metal installations, refer to specialized guidelines like the ROOFING INSTALLATION GUIDE from EDCO, which emphasizes using high-temperature ice-and-water shield because metal roofing conducts and traps significant heat, which can melt standard adhesive backings.
Mastering Valleys, Flashing, and Ventilation Systems
Valleys and penetrations are the most vulnerable areas of any roof. If your roof is going to leak, it will almost certainly happen here.
Flashing Valleys, Chimneys, and Penetrations
Valleys channel massive volumes of water during heavy downpours. There are three main ways to construct a valley: open, closed-cut, and woven.
- Open Valleys: Utilize a pre-formed metal valley lining (minimum 24 inches wide) made of corrosion-resistant metal. This is highly recommended for its durability and clean water flow.
- Closed-Cut Valleys: Shingles from one side run completely through the valley, while shingles from the other side are cut back parallel to the valley centerline.
- Woven Valleys: Shingles from both sides are woven together across the valley.
Regardless of the method, always lay a 36-inch-wide strip of self-adhering leak barrier down the center of the valley before installing any shingles or metal.
For chimneys, skylights, and dormer walls, you must install step flashing and counterflashing. Step flashing consists of L-shaped metal pieces woven into each course of shingles. Each piece must overlap the previous one by at least 2 inches. Counterflashing is embedded into the mortar joints of brick chimneys and folds down over the step flashing to shed water.
If your chimney is wider than 30 inches, building codes require a chimney cricket (a small peaked saddle structure built behind the chimney) to divert water around it. Learn more about this in our guide on Best Practices For Installing A Roof Cricket Essential Guide.
Additionally, always install kick-out flashing where a roof edge meets a vertical sidewall to prevent water from running down behind the siding. For step-by-step instructions, check out the Kick Out Flashing Install guide. Finally, seal all pipe boots with durable, high-performance elastomeric sealants (like Lexel) rather than cheap silicone, which degrades rapidly under direct UV exposure.
Ventilation Requirements and Attic Considerations
A long-lasting roof requires a balanced attic ventilation system. Without proper ventilation, heat and moisture build up in the attic, causing shingles to bake from the inside out, deck boards to warp, and mold to grow.
The standard building code requirement is the 1:300 ventilation ratio, which dictates 1 square foot of net free ventilation area for every 300 square feet of attic floor space. This ventilation must be balanced: 50% intake at the soffits (eaves) and 50% exhaust at the ridge (peak).
Continuous ridge vents are highly efficient because they utilize natural convection to draw hot, humid air out of the attic. To understand the differences between various vent styles, read our comprehensive Roof Vent Installation Guide Static Vs Turbine Vs Ridge. Proper ventilation also prevents winter condensation, which occurs when warm, moist indoor air escapes into a cold attic and condenses on the underside of the roof deck.
Choosing Your Material: Shingles vs. Metal Roofing Installation
Your choice of roofing material impacts not only the look of your home but also the installation complexity, overall cost, and wind resistance.
Comparing Metal Roofing Installation Methods
Metal roofing has surged in popularity due to its extreme durability and energy efficiency. There are two primary types of metal roofing panels:
- Exposed Fastener Panels (e.g., R-Panel, Corrugated): These panels overlap and are fastened directly through the metal face into the decking using screws with neoprene washers. They are cost-effective but require ongoing maintenance to ensure the rubber washers do not dry out and leak.
- Standing Seam Panels: These feature raised interlocking seams that hide the fasteners entirely. The panels are secured to the deck using hidden clips, allowing the metal to expand and contract freely with temperature swings.
For step-by-step guidance on metal panel layout, see How To Install Metal Roof Panels An Easy And Affordable Guide.
If you are installing a premium standing seam system, keep in mind that thermal movement must be carefully managed. As outlined in the Skyline Roofing Guide, panels exceeding 40 feet in length must never be pinned down with tight through-fasteners; they require specialized floating clips to prevent the metal from buckling or tearing as it expands in the hot summer sun.
Avoiding Common Causes of Roofing Failures
Improper nailing is the leading cause of roof failures during windstorms and severe weather. Whether installing shingles or metal, you must adhere strictly to manufacturer specifications.
For asphalt shingles, keep these rules in mind:
- Nail Placement: Nails must be driven straight and flush within the designated nail strip. If nails are driven too high, they miss the underlying shingle course, rendering the wind warranty void. If driven too low, they remain exposed, leading to rusted fasteners and leaks.
- Under-driving and Over-driving: Under-driven nails (heads sticking up) will eventually wear through the overlying shingle. Over-driven nails (driven too deep by high pneumatic pressure) cut straight through the shingle backing, allowing wind to tear the shingle away easily.
- Nail Count: Standard installations require 4 nails per shingle. However, in high-wind regions, manufacturers require 6 nails per shingle along with starter strips at the eaves and rakes.
Professional vs. DIY Roofing: Process, Cost, and Warranties
Should you tackle your roofing installation yourself or hire a professional? Let’s look at an honest assessment of the costs, processes, and long-term protections involved.
The DIY Approach: Pros, Cons, and Realities
The primary driver for DIY installation is cost savings. Labor typically accounts for 50% to 60% of the total cost of a professional roof replacement. However, the trade-offs are steep:
- Physical Toll: Carrying 80-pound bundles of shingles up a ladder all day is exhausting work.
- Safety Risks: Working at heights carries inherent dangers, and a single fall can result in severe injury.
- No Labor Warranty: If your roof leaks due to an installation mistake, you are on your hook for the repair costs.
- Tool Costs: You will need to buy or rent specialized tools, including pneumatic nailers, air compressors, roof brackets, and safety harnesses.
If you are dealing with a flat or low-slope roof, the complexity increases significantly. For a detailed breakdown of low-slope systems, refer to Everything You Need To Know About Fixing Flat Roofs.
The Professional Advantage: Warranties and Peace of Mind
Hiring a professional contractor ensures the job is done quickly, safely, and in compliance with local building codes. Furthermore, certified contractors can offer extended manufacturer warranties that are completely unavailable to DIYers.
| Feature | DIY Installation | Professional Installation (Martin & Sons) |
|---|---|---|
| Average Labor Cost | $0 (Sweat Equity) | Included in upfront pricing |
| Installation Time | 1 to 2 weeks (weather permitting) | 1 to 3 days |
| Safety Risk | High (User responsibility) | Insured & OSHA-compliant crews |
| Material Warranty | Limited (Often voided by installation errors) | Full manufacturer backing (up to 50 years) |
| Labor Warranty | None | Lifetime Labor Warranty |
| Upfront Cost | Retail prices for materials and tools | Best wholesale prices upfront |
| Payment Terms | Paid immediately at retail checkout | No upfront deposits (Pay on 100% completion) |
When you hire a certified contractor, such as GAF-certified pros found through the GAF Roofing Contractors in Saint Charles directory, you gain access to systems that are fully inspected and backed by the manufacturer. Professional teams handle all permit acquisitions, schedule municipal building inspections, and ensure your roof meets local wind and ice-shield codes.
Frequently Asked Questions
How long does a typical roofing installation take?
In 2026, modern professional crews are highly streamlined. A standard 2,000-square-foot asphalt shingle roof installation typically takes 1 to 3 days to complete. Metal roofing or tile installations may take slightly longer, usually 3 to 5 days, depending on the complexity of the roof’s hips, valleys, and pitch. Weather delays (such as rain or high winds) can occasionally extend this timeline.
Can I install new shingles over an existing roof?
While some local building codes allow for a “layover” (installing a second layer of shingles over the first), it is highly discouraged. A layover prevents you from inspecting the wood deck for rot, adds massive structural weight to your home, and typically voids the manufacturer’s wind and material warranties. It is always best to tear off the old roof down to the bare deck.
What is the minimum roof pitch for metal panels?
Most standing seam metal roofing systems can be installed on slopes as low as 2:12 or 3:12, provided a high-temperature, self-adhering underlayment is used across the entire deck. Exposed fastener metal panels typically require a minimum pitch of 3:12 or 4:12 to ensure water sheds quickly and does not back up through the gasketed screw holes.
Conclusion
A successful roofing installation is a multi-layered shield that protects your home from the elements. From inspecting the wood decking and laying down water barriers to fastening shingles with precision and balancing attic ventilation, every single step is critical.
If you are ready to replace your roof but want to avoid the safety risks, physical strain, and warranty headaches of a DIY project, we are here to help. At Martin & Sons, we serve homeowners throughout St. Louis, St. Peters, St. Charles, Florissant, Chesterfield, Creve Coeur, Maryland Heights, and O’Fallon.
We believe in making home improvement completely stress-free. That is why we offer no upfront deposits, meaning you pay only upon 100% completion and satisfaction. We also provide our best prices upfront and back our work with a lifetime labor warranty.
Ready to secure your home with a beautiful, durable new roof? Contact us today to schedule your free estimate and learn more about our Martin & Sons Roofing Installation Services.